Why do so many people replace laptops that still have life left in them? The Croma Unboxed guide highlights that many people replace their laptops simply because they run slowly.
However, there’s a $200 solution that can deliver 60% of a brand-new computer’s performance boost.
Yes, I am talking about the 35-DS3chipdus3 chip installation.
It’s a flexible module available as firmware, software, or a physical chip. It is built to enhance performance beyond everyday limits.
However, only a small number of people are aware of this option. A minor chip upgrade can fix the problem and save money.
This guide provides a step-by-step installation guide for the chip. You will also learn how to set it up for the best results. Let’s get started.
What is 35-ds3chipdus3 Version?
The 35-DS3 chip is a smart upgrade chip that works with older systems, improves multitasking, and saves money by avoiding a full replacement. It is ideal for users who want better speed without buying a new computer.
This compact chip enables the seamless operation of new apps and heavy tasks without any issues. If your desktop or laptop feels slow, installing this chip might give it a big boost.
It is also an affordable way to upgrade old systems without replacing the entire components, unlike traditional upgrades that typically require replacement.
What Are the Key Benefits of Installing 35-DS3chipdus3?
It keeps your device cooler and easily executes heavy applications. The chip also extends the lifespan of your system and prepares it to accept future software updates. You do not need to conduct expensive upgrades any time soon.
To understand the chip’s real impact or benefits, let’s check the direct performance comparison.
|
Performance Metric |
Without 35-ds3chipdus3 | With 35-ds3chipdus3 | Improvement |
| Boot Time | 35-45 seconds | 12-18 seconds |
65% faster |
|
Application Launch |
8-12 seconds | 3-5 seconds | 60% faster |
| Multitasking Stability | Moderate | Excellent |
Significant |
|
Power Consumption |
100% baseline | 80-85% baseline | 15-20% reduction |
| Heat Generation | High | Low-Medium |
30% cooler |
|
Software Compatibility |
Limited | Excellent |
Dramatically improved |

How Do You Know If Your System Is 35-DS3chipdus3 Ready?
Before installing the 35-ds3chipdus3 version, ensure your device is compatible with it. It works with desktops, game consoles, and some laptop models. Variants of the 35-ds3chipdus3 chip may need different firmware or microcode.
Make sure you know your revision number (it is printed on the chip or the package). Do not break your system by updating to an incorrect firmware. Minimum system requirements are,
- Operating system: Your system must run on Windows 10 or 11, MAC OS 10.14, or Linux 18.04, and higher versions of Ubuntu.
- RAM: You should have at least 4GB of RAM available in your system. 8GB is preferred for efficient performance.
- Storage: Ensure your computer has atleast 500 MB of free space to install the chip smoothly.
- Motherboard: Check if your motherboard supports the chip. This information can be in your manual or specifications sheet of a device.
When you are certain that your system is ready, you should go on and get your tools ready.
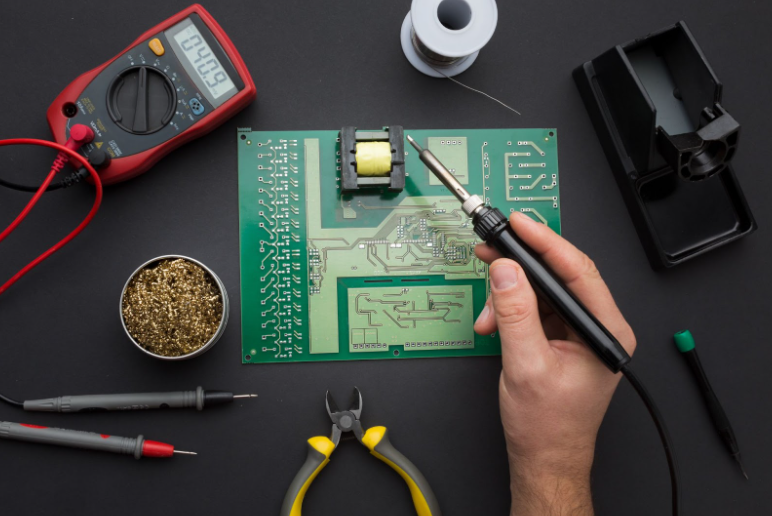
What Tools do you Need Before Installation?
A successful 35-ds3chipdus3 installation is based on proper preparation. Necessary equipment and good working conditions will make it an easier job with a low possibility of breakage. Be sure to prepare the equipment.
- Phillips head screwdriver (magnetic tip recommended)
- Flathead screwdriver (small size)
- Anti-static wrist strap (essential for component protection)
- Small parts tray (to organize screws and small components)
- Clean, lint-free cloth
- Compressed air canister (for cleaning)
- Device user manual (for reference)
- Backup storage device (external drive or cloud storage)
How to Install 35-DS3chipdus3?
The installation of 35-ds3chipdus3 requires careful attention to detail and patience. Follow these steps to ensure optimal results.
Phase 1: System Preparation and Access
Step 1: Complete System Shutdown
Turn your device off and unplug all the USB peripherals and cables. In the case of a laptop, take out the battery. Wait for at least 30 seconds to ensure the power is completely discharged.
Step 2: Workspace Setup
Your workspace should be tidy and bright with a stable surface. Connect your anti-static wrist strap and make everything in reach.
Step 3: Device Disassembly
Open the device tamper-proof cover by carefully following the device manufacturer’s guidelines. You can make a note or keep photos of the disassembly process so that you can reassemble it easily.
Phase 2: Chip Installation
Step 4: Locate Installation Slot
Find the intended chip slot. Usually, this is next to the processor or the RAM modules. Refer to your device’s manual to find the location.
Step 5: Remove Existing Component (If Applicable)
When replacing a chip, remove the holding clips or screws carefully. Without damaging the socket, gently take out the old piece.
Step 6: Install 35-DS3chipdus3
Position the new chip vertically in this socket and ensure it fits correctly. Use gentle pressure until the chip is securely in place.
Phase 3: System Reassembly and Testing
Step 7: Reassemble Device
Put everything back into its original place and test out all the connections. Take a moment to confirm with the notes you have taken and arrange all the screws properly.
Step 8: Initial Power-On Test
Plug in the power and switch on. Examine the boot process and any error indications or unusual responses on your device.
Step 9: Driver Installation
To download the latest drivers, visit the manufacturer’s site. Install it and download. This is an important measure towards defining optimal performance and stability.
Step 10: Performance Verification
Use benchmark tests to ensure better performance. Such tests are Geekbench, CPU-Z, PassMark PerformanceTest.

What Are the Installation Challenges and How Can You Fix Them?
The installation may create difficulties despite the best preparations. The most common problems and the solutions to them are,
- Device won’t boot: If your computer won’t turn on after installing the chip, it might not be fitted properly. Take the chip out slowly. Put it back in carefully and check all cables and parts.
- Slow performance: When the speed is still considered slow, outdated drivers may be the reason. Replacing all your system drivers and restarting your computer will generally smooth your performance.
- System overheating: Check if the fans are dusty or blocked. The cooling paste between the chip and fan might be dry. You can replace it with fresh thermal paste.
- Compatibility errors: Seeing random errors or your system not recognizing the chip? You may have the wrong model. Ensure the chip is compatible with your motherboard and it has the same specification.
- Random shutdowns: If your computer shuts down without any warning, check all the cables and the power supply. A good wattage PSU keeps your system stable.
Follow these additional steps if you are still facing issues.
Advanced Troubleshooting Methods
- BIOS/UEFI Reset: Use clear CMOS to restore default settings
- Safe Mode Check: Restart your computer in safe mode to identify faulty drivers
- Hardware Diagnostic Tools: Work with built-in diagnostics to identify component issues
- Professional Consultation: Go for expert help for complex problems
What to Do After Installing 35ds3chipdus3?
Successful installation is just the beginning. Proper maintenance and optimization ensure long-term performance benefits from your 35-DS3chipdus3 upgrade.
Upgrade drivers monthly: Maintain a smooth and compatible system by keeping your drivers up to date. Use tools like Device Manager or the manufacturer’s website to update them.
Monitor performance every 3 months: Track the speed and slowdowns of catches using Benchmarking software like CrystalDiskMark or PassMark.
Inspect hardware twice a year: Detect hidden issues before they affect your system. Use visual checks and basic diagnostic tools.
Now that we have covered long-term care. Let’s dive into how this upgrade improves things for real-world users.
Real-World Performance Impact of 35ds3chipdus3
Gaming Performance Enhancement
Gamers experience significant improvements in:
- Frame Rate Stability: Get reliable and Consistent performance in demanding titles (high-end games that need a lot of processing power, like Call of Duty)
- Loading Times: Gamers experience swift level and asset loading
- Multitasking: It provides seamless streaming practice while gaming
- Temperature Management: Gamers get efficient temperature management options during extended sessions
Professional Workload Benefits
Content creators and professionals see improvements in:
- Rendering Speed: People get 25-35% faster video and 3D rendering
- Application Responsiveness: Deliver smoother operation of creative software
- File Processing: Highlights faster compression, conversion, and analysis tasks
- Virtual Machine Performance: Better virtualization performance
Business and Productivity Applications
Office environments benefit from:
- Boot Time Reduction: Busy professionals access faster system startup for improved productivity
- Application Launch Speed: Teams stay focused with instant access to business applications
- Multitasking Capability: Seamless switching between multiple programs supports fast-paced workflows
- Energy Cost Savings: Companies notice reduced electricity consumption after upgradation
Upgrading your old device makes it faster and saves money. It also helps the environment by reducing waste.
How does Upgrading Help the Environment?
The decision to upgrade instead of replacing your device has environmental advantages:
- Less E-waste: Longer life cycle of the device will decrease e-waste
- Reduced Carbon Footprint: Producing new gadgets consumes a significant amount of energy
- Resource Conservation: Maximization of the available hardware usage
Final Statement
The 35-ds3chipdus3 installation is one of the most economical solutions to optimize your system’s performance in 2025. When executed correctly, prepared in advance, and continued through follow-ups, this upgrade will make the old device functional to the current application and workflow.
The energy efficiency and device longevity make the 35-ds3chipdus3 a smart purchase on both an individual and business level. Whether you’re a gamer who needs a more stable frame rate or anyone who just wants their computer to be more responsive, this upgrade delivers exceptional results.
Are you ready to reinvent the performance of your system? Get your tools, back up your data, and start your 35-day 3D chip installation now. It is time to move to your more efficient and faster system.
FAQs
The chip is compatible with lots of devices, but recheck before purchasing it. Explore the list of supported models or request the help of technical support. This information will help you have a compatible fit to your system.
It takes between 45 and 90 minutes. It may take 2 to 3 hours, especially on the first experience. This time included chip installation and testing.
This depends on your manufacturer and warranty terms. Some allow user upgrades, while others may cancel coverage. Check your warranty documents carefully before proceeding.
Yes, the 35-DS3chipdus3 can be safely removed by reversing the installation process. Keep the original components for warranty situations.
Ensure drivers are correctly installed and updated. Run benchmark tests to measure improvements, as some gains may not be immediately noticeable in daily use.


